What Do Deer Eat in the Winter?

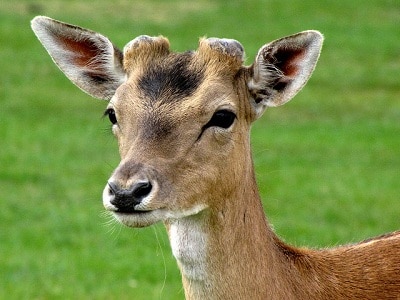
Depending on the location in North America, it is usually a simple task to see what the deer in an area are eating.

What do deer eat in the winter

What do deer eat in the winter

They graze in open fields and praries as opposed to poaching crops and farms, a serious plus for farmers and ranchers.

But the typical whitetail deer will put down 3-to 6-pounds of food every day. This is a tall order for the offseason, when peak harvests are done and there isn’t much popping out of the ground.

So what do deer eat in winter? Let’s take a look.

What do deer eat in the winter?

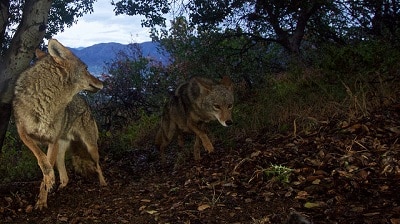
The first thing that must be noted about what deer eat in winter is that they are scavengers in the truest sense of the word.

Deer are not going to steal food from established plants. They don't have the nose or taste for row crops.

In their quest for offseason sustenance, deer are known to make their way onto people’s property. Their footsteps are much more noticeable in the snow than they are in the winter. Typically, whitetail deer are searching for eat corn, soybeans or cowpeas that are unguarded and not rotten.

Also keep an eye out for what’s known as "Old Man's Beard." This is a thick, greenish lichen that is common on spruce and amber trees that are either dead or dying. If you haven’t seen this stuff before, keep an eye out for tracks leading towards trees that obviously aren’t providing shelter for the deer. They aren’t rubbing antlers in the winter like they do in summer and fall, so there’s a pretty good chance that you’ll see the lichen on trees surrounded by deer tracks.

These items make up a large part of a deer’s wintertime diet. Additionally, they will scrap up what they can from grassy fields and open spaces. But the vast majority of deer aren’t going to get nearly as much protein in the winter as they do in the warmer months.

Here’s a great video on deer nourishment for the winter.

How to direct a deer to the best winter food on my property

In the western United States, farmers and ranchers should maintain corn and soy plants to attract deer to certain areas of their land. This also works if you want to keep the deer away from other parts of the land, which we’ll discuss in more detail below.

Resilient crops such as these work best for late-season feed. Corn is the deer’s lifeblood during these times. They will travel to find it, but once a pack of deer has identified a location that looks like a promising regular food source, they are going to do everything they can to remain in the area.

Remember that you don’t want deer eating at the same location all the time. Not only will this wear out the crops and soil, it can increase the risk of disease in the deer. Offset the planting times in different areas of your propery to scatter the deer’s dining habits and keep them moving around.

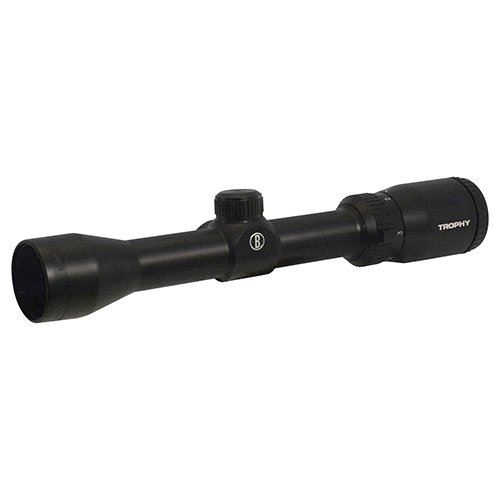
If you are deer hunter, you should own an deer rifle, i recommend ar 15 and best scope for deer hunting

How to keep deer from rummaging my property

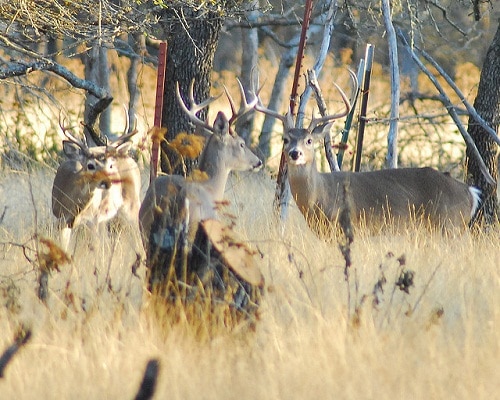
Those of you who live on acres of property or who run a farm may see deer consistently perusing your fields.

This is a natural activity for them, and they aren’t going to notice simple hints that are left to deter them.

You want to keep them around, but don’t want them destroying certain parts of the property.

Eating wild male cheetal deer

Eating wild male cheetal deer

Like we mentioned above, deer are scavengers. Your open field contains the sparse plants that survive in winter, and the deer you see have likely spent immense time tracking it down. If you want to get rid of them, the best thing to do is plant perennial yields of tall crops on areas on the edge of the property.

This may not be possible for you. If not, resort to fencing. Once you’ve got that up, stick a guard dog out there in the yard. In the morning and evening hours, let the dog roam the property and hopefully he/she will stir up enough noise to shoo off the deer. (On a humorous note, this is a great way to get that dog of yours to earn his keep around the house!)

These are about the only other surefire ways to keep multitude of deer off your property.

What to do when deer bed near my property in winter

Deer want to remain as close as they can to their food sources, especially in winter time. It is especially important to direct their eating to different places on a regular basis.

What to do when deer bed near my property in winter

What to do when deer bed near my property in winter

If you are trying to study what the deer is eating in winter, first identify where they are sleeping.

What is nearby? 

In order to find their bedding, look for thick brush that is difficult to enter and exit. They will find the densest cover, particularly during times of incremental weather. Deer prefer thick cover from predators, humans, and frigid temperatures.

Beyond the more intensive winter bedding conditions, it is important to realize that because the deer aren’t getting protein as easily in the winter as they do in summer, they aren’t going to want to expel as many calories.

This is a big motivator behind their proximal bedding and eating quarters.

Conclusion

If you plan to bait or feed deer this winter, be sure to check for any regulations in your area.

Many states in the US have imposed limitations (and in some cases completely outlawed) feeding deer in the winter. These regulations are typically designed to keep herds from thinning due to illness.

But if you can get away with it, your next hunting outing or antler collecting search can be made that much more fruitful by keeping deer healthy in the winter.

Let’s spread the good word about responsible hunting and outdoorsmen practices – please give this article a share on your social channels.

We’re also always looking for stories from your neck of the woods. Drop a comment below this article and let’s all learn about the hunting and whitetail communities around the country and beyond!

Shed Antlers: A Natural Process for Deer

Deer are among the most mystical creatures on the planet. Long sought after by hunters. The cause of many ‘oohs’ and ‘ahs’ among children and hikers. A regular sighting in many regions throughout the world.

But with how common deer are throughout North America, it’s surprising how little most people know about them. We’re aiming to change that.

Today we’re going to take a look at how and why deer shed their antlers.

What are antlers?

Antlers on deer are, for all intents and purposes, an extension of bone.

what's deer antler

what's deer antler  jans canon

Honeycombed bone, to be exact, that grows outside of the body. They extend outward from the pedicles. These are permanent fixtures on a deer’s head that develop during the first year of the buck’s life.

Each year, the antlers protrude outward from the pedicles.

There may be slight differences in the antlers year to year.

A buck’s health is one major reason for this.

The antlers will develop quickly. The process usually doesn’t take longer than two to four months and starts late in the Spring here in North America.

Testosterone, the male hormone, is the main factor in how a deer’s antlers will develop. Velvet is formed.

Over the course of the Spring, Summer, and Fall, the deer will typically rub his antlers against trees.

The velvet, as a result, shrinks and starts to tumble off, a procedure that actually benefits the animal because the antlers are strengthened and grow back again the next year.

The entire procedure is rehashed every Spring, and as long as the deer maintains decent testosterone levels he will keep his antlers deep into the Autumn season.

Here is a time lapse antler growth video:

Natural cycles which cause deer to shed their antlers

Why do deer shed their antlers?

It may not surprise you to learn that the reason this happens is purely natural. It all starts during the rut. Throughout this time, deer begin to lose the velvet on their antlers. It usually begins to happen in November in North America.

The biggest reason behind this is a drop in testosterone in the deer. As the testosterone drops, the antlers begin to loosen and eventually fall off. Without high levels of testosterone, the deer experience a weakening in the tissue, as well as the bones, at the base of the antlers.

Once a significantly low point is reached, the antlers fall off.

When does this happen?

There is a defined evolutionary process behind the shedding of a deer’s antlers. How familiar are you with photoperiods? Photoperiods act alongside the testorone to develop the antlers and determine when they will fall off. Genes also help determine early or late development and shedding of antlers because family history can have an impact on the overall health of the deer.

Emotional factors play into this as well. Deer experience social anxiety much like humans, which has a negative impact on their health and thus can lead to earlier dropping of the antlers.

A deer will generally lose his antlers at a similar point every year, barring medical emergency. Testosterone levels rise during the development and the subsequent shedding of the velvet. As the seasons begin to change, the physiological reaction of antler shedding is triggered.

When should a hunter get out and find the sheds?

Depending on where you are located in North America, early spring is typically the best time. Those in Colorado and southern parts of the country can start earlier because it typically warms earlier than it does in Canada, Minnesota, and other northern and colder areas.

We like to point out that while antlers can be found year round, the rise in popularity of collecting them generally means that if you aren’t on the ball early in the spring, there’s a strong chance that you will miss out entirely.

February for southern areas is a great time to start. Further north, March into April will suffice. Often, it depends on snow melt because the antlers might get covered over the course of the winter.

Light snow years mean that antler hunters can get out earlier than during heavy snow years. Ar15 with best scope for deer hunting is good choice in a deer hunt

Here is a great video of a buck shedding antlers.

How long does it take for a deer to lose its antlers?

This all depends on how rapidly the deer’s testosterone levels drop.

In many cases, this can happen in less than two days. The antlers may appear to be firmly affixed one day. Then, as the rut progresses and natural cycles occur, the antlers begin to loosed rapidly

Before long, a sudden jerk of the head or scare from afar puts that final feather on the dam. The tissue is no longer strong enough to support the antlers, and as a result they simply fall off.

How To Attract Deer To Your Yard

Generally speaking, peak condition bucks will hold onto their antlers longer than unhealthy or weaker bucks. They are able to maintain stronger tissue and remain in better physical condition, resulting in higher than average antler-to-head durability.

Late drop can be affected by a few distinct causes. Variable deer populations in an area play a big role. Low population means shedding won’t optimize until late March or April.

Second, first-year grovels that achieve rearing weight their first winter will come into estrous. This for the most part happens well after the pinnacle groove and is the primary driver of the second trench in many spots.

Also, circumstances like these will keep a buck’s testosterone levels higher for longer periods of time. If there is a lot of rivalry going on among male bucks, testosterone levels will peak. Strong mating seasons also have a similar effect.

Conclusion

Now you’ve got a general understanding of why and when deer shed their antlers.

The most important thing to keep in mind is what part of the continent you’re in. We can’t emphasize this enough- get out early! Early season leads to better antlers that are found with more ease and less time.

If you’ve enjoyed this article, please give us a share on social media. We all love deer, hunting, and antler collecting. Help us spread the good vibes! If you have specific hints on antler collecting that relate to your area, leave them in the comments below. Let’s make this the ultimate resource for antler knowledge!

What’s the Best Coyote Bait for Property Hunting? (6 Coyote Baits)

When a coyote is becoming a nuisance on your property, the time comes when the only sensible option is to shoot it. But how to lure the poor bastard in to range, and keep him there long enough to get the shot off?

The preferred way to do this is with bait.

There are a number of options available that will suit the cause just fine, but a few stand out from the rest.

DO NOT buy bait from a store, as coyotes have become smart enough to recognize unnatural items. It’s important to be conniving to be effective.

Here are the best coyote bait for on property hunting.

Best coyote bait

The ideal coyote bait is the remains of a live animal.

The bigger and meatier, the better.

This can be tough, but keep an eye out for squirrels and other scurry animals that may be on the property.

It is encouraged to keep small animals and smaller bait options around for spells when there are many coyotes or little large bait.

They make decent bait in a pinch.

There are, however, a handful of better options. Let’s take a look at them.

Here is a video of baiting coyotes. But first, you need to know how to find coyote 

1. Pigs or hogs

Hogs make a good coyote bait because of the smell and the fact that they act as a meat source.

The problem with dead hogs is that they can be difficult to come by. Your best bet is probably to ask a hog farmer if he has any meat available for you. Perhaps he will have a rotten hog carcass that he is willing to part with, or at least part of one. It isn’t necessary to have an entire hog, especially if you are only hunting one or two coyotes. They will be lured by the sheer fact that there is meat available that they didn’t have to work for.

2. Deer carcass

The best coyote bait is a deer carcass.
Coyotes are naturally attracted to everything about it, and will be lured in by the smell of a dead animal.

Deer carcasses have the benefit of being generally larger than most other live animal coyote baits available. This can confuse the coyotes, which is a good thing because they won’t suspect that it is a trap.

If there is frequent roadkill in the area, that can be a great source of deer carcasses.

Note: It is important to check local law to make sure that this practice is legal in the region.

It would be terrible to receive a citation for hauling a deer carcass when all you’re trying to do is hunt coyotes.

Another downside of deer carcasses, because of their size, is that it often takes more than one person to haul, relocate, and stage the dead deer. Other than that, deer are the best coyote bait for most situations. 

You can also use meat or parts of an animal that you hunted yourself that aren’t being used. Any responsible sportsman is all about using every part of an animal they kill, and this offers an opportunity to do just that. Granted, another animal is going to be killed, but you can use that one as well or have it be feed for vultures or other wildlife.

3. Afterbirth

If you’ve got access to a farm or are a farmer yourself, horde the afterbirth from baby calves.

There is nothing that attracts coyotes by smell better than afterbirth. It is completely disgusting, but don’t actually touch it. Store in secure container and leave out at night.

When the hunt is ready, the stench will have already filled the air and attracted any coyotes in the nearby area. The downside here is that you have to use it right away, because who the hell wants to store afterbirth on their property? The timing is the issue that prevents this from being the best coyote bait. This scenario only works if your calves are born at the same time as you are needing to hunt coyotes on the property.

5. Beavers

We can’t condone illegal use of beaver for bait. But if access to a beaver corpse is doable, beaver can make a great option. Coyotes view beaver as a treat, something they don’t dine on every day, and will be willing to take more risks for the satisfaction than they would for other, smaller prey like rabbits.

This gives the opportunity to place the bait in a more ideal location for the hunter. Bring them in a little closer, and take the shot before the coyote is able to haul off the bait.

6. Where to place the bait

This is one of the most important factors in coyote hunting.

The bait must be placed in a location that:

  • a) attracts the coyotes without tipping them off that it’s a trap, and
  • b) is convenient for the hunter to target and shoot them while they’re there

In order to find the perfect location for coyote bait, first analyze your shooting location.

Is it well hidden? In a trench, or elevated? What kind of angles are you dealing with, and what are the weather factors? Make note of these, and then walk the perimeter of the area.

The goal is to find a spot that doesn’t require any movement on your part to get the shot off. If the coyote bait can be staged in an open area, or at the crest of a berm, the shot will be easier.

If the problem is that there are no open areas, consider cleaning out a spot or shifting the hunting field altogether (if possible).

I recommend you should bring the best ar bipod in coyote hunting. It will help you. 

Conclusion

There are many other options when it comes to coyote bait.

But these four are the best options.

They aren’t always going to be available, so it’s best to be able to find bunnies, squirrels, geese, etc. to use in situations where larger bait is absent. As always, be sure to follow any local laws and practices for coyote hunting.

They may be a nuisance, but so is a hefty fine or punishment.

If you’ve enjoyed this article, please blast it out on your social channels. Have any tips on best coyote bait? Leave them in the comments below!

5 Frequently Question You Need To Know About Coyote Howls?

Coyotes are among the most common animals hunters run into both at home and in the wild.

They are spread across the US, with the eastern coyotes being larger than those seen out west.

Coyotes are interesting animals, and very vocal to boot. They are one of the few animals not easily displaced by expanding cities. Coyotes are often seen sprinting across roads, railroad tracks, even parking lots of shopping centers.

Perhaps their most notable trait is the coyote’s howl. Let’s take a look at some basics of coyote howls, and everything you need to know about them.

1. Do coyotes howl?

The short answer is YES!

Coyotes do howl, and because they travel in packs, they often howl all at once.

A coyote howl is kind of like a high-pitched squeal. In some ways it is similar to a dog bark and in other ways it is very different.

The howl starts relatively calm, with some yipping and squealing. As more and more coyotes join in, it starts to sound like a group of old people laughing hysterically all at the same time. In the most annoying, high-pitched laugh possible.

Many who live in Western areas like Colorado, Utah, and other states encounter coyote howls regularly.

Those that live on the fringe of big cities or in rural areas often here the howls at night, after dusk, as the pack moves towards their location for the evening.

Here is a great video of coyotes howling:

2. Why do coyotes howl?

The coyote howl is the main form of audible communication between coyotes.

Coyote packs, typically families, may spread out to hunt on their own.

The howl, in this case, would be started by a pack leader with the intention of bringing the pack back together again.

A prolonged session of howling may indicate that the pack is spread out. As more and more coyotes join in, the collective howl continues to get louder and more prolonged.

Embracing the true pack mentality, coyotes are territorial creatures. One pack crossing onto the territory of another pack (often a larger or more settled one) is severely frowned upon. This is a frequent source of why coyotes howl. The howl is basically a warning, as if to say “Stay off my lawn.”

3. When do coyotes howl?

The main coyotes doing the howling are the small group (often 2) of lead coyotes who are mated and head the pack.

Because of the way that their howls change pitch as they are emitted and pass through the surrounding environment, it often sounds as though there are as many as a dozen coyotes howling at once.

This is usually not the case when orders are being barked.

However, other coyotes will howl when they need to respond. If other pack leaders are in the area, they may decide to start howling as well, and this is when coyote howls really get going.

They can stretch across acres of terrain. In suburban areas, because coyotes aren’t turned off by the houses and development, this often causes quite a noise disturbance.

The lead coyotes howl when they need to alert the group to come back together. They also howl when they are disturbed or upset.

This type of howl will be done usually by only one coyote at a time, and isn’t meant to cause a whole chorus of replies.

If you are walking your dog and the coyote catches wind of it, he may emit a howl at the perceived threat. This can also happen when no dog is present.

4. What do coyote sounds mean?

Typically, coyote sounds reflect the current communication needs of the coyote.

Whether that be a warning from the alpha coyote to the rest of the group, or one coyote noting a threat.

It can also mean that there is a disturbance or annoyance to that particular animal.

Often, coyotes will howl to alert the group of a threat real or imagined.

Maybe a coyote is wandering around the edge of a territory and comes across something of note. A howl may then be used as a signifier.

Coyotes have great hearing, and can often comprehend a howl and its purpose from over a mile away. This is especially true during group howls, as the sound carries across the landscape. A coyote may emit a howl so that others in the pack know where he or she is and can find their way to their family member.

Here is a video of different coyote howls and noises.

5. What should I do when I hear a coyote howl?

If you hear a coyote howl, but can’t see the coyote, the first thing to do is keep an eye out. They are nearby, and are likely aware of your presence. They aren’t prone to attack humans straight away. They also spook easy and will retreat if they feel threatened.

In most cases, the coyote howl is internal communication between the pack and not intended for you at all. When more than one coyote is howling at a time near you, they are using normal communication to call the group back together or perform other routine tasks. It can sound intimidating, but shouldn’t necessarily be perceived that way. Coyotes aren’t usually on the prowl for humans in highly populated areas.

Still, it is advised to move away with caution. Absolutely do not run at the coyote or throw sticks or rocks at it.

Conclusion

This should give you a basic understanding of coyote howls and what their intended purpose is. If you are using ar10 rifle, i have the post about the best ar10 scope for hunting, you will find the good scope for your ar. 

As you can see, these howls are not usually meant to be threatening to humans in any way.
The coyote communicates with those in his pack regularly, and the howl is their standard verbal diction.

There is no need to fret when you hear a coyote howl. Instead, stop and listen and try to figure out what you think the coyote is trying to say.

Share your thoughts on coyote howls down below in the comments.

Also, please share this article on social media so that we can spread awareness of what coyote howls mean and break any preconceived notions that are just plain false.

Coyotes are lovely creatures.

Hunting a Coyote? Let’s Find How to Trap a Coyote

Is a coyote being a constant nuisance to you, your property, or your animals? The best option for you may be to learn how to trap a coyote. This is a tricky task, but it can be done.

I trapped my first coyote at the age of 22 after several failed attempts over the years. My grandpa had the method down to a science, but it took me many tries to finally get it right.

Here in this article I’m going to fill you in on how to trap a coyote, and mistakes to avoid during the process.

Identify the correct coyote.

Coyotes travel in packs, but are very individually motivated when certain instincts chime in.

This is important when it comes to how to trap a coyote because if you catch the wrong one, your damage problems are going to continue.

Before ever setting the trap, do some studying and observing of the coyotes in your area.

Most problem-causing coyotes are youthful males at the peak of their strength and ability. Because of their highly agile demeanor, these coyotes have enough confidence in their skill at getting away (mixed with a lack of control over their instincts) that they are more willing to take risks.

Once you’ve caught a coyote, look for tell-tale signs of livestock damage.

Check their teeth and paws for evidence of a killing. Check their fur for any signs of your property and your livestock.

Use a large quick-response trap

Some characteristics of the trap I always use, that I got from my grandpa:

  • 6-inch jaw spread. This is a minimum. Due to their speed and high level of awareness that coyotes maintain, you’re not going to fool them into stepping in anything smaller than that
  • Number 3 coil. This one is the right size and speed to trap the coyote before they have a chance to get their paw or body part out of the way
  • Any part of the trap must act as one unit. If you have problems clamping onto the coyote, the answer is to increase the velocity of the closing mechanism. I highly encourage you to buy a new trap from a reputable dealer instead of modifying one that you already have

Set the trap where there is evidence of disruption

Coyotes are prone to return to areas that have been fruitful for them in the past. Set your trap near the area where an incident has occurred. If you have any type of a livestock decoy that can assist the situation, set it up there.

Here is a video on trapping coyotes.

One place I really have found great is elevated areas. I like to place the trip off to the side of a ridge peak. Always in the direction I suspect they are moving in as it relates to where the incidents are occurring.

Here are the most frequent areas I’ve had success when working on how to trap a coyote:

  • Feeding areas. Coyotes smell not just your livestock, but their food. This draws them in because they sense the double whammy. When setting a trap here, be sure it is somewhere that your animals are not going to step in
  • Small openings. Coyotes work their way into holes in fences, yards, and other areas that provide a sort of secretive entrance and exit. This makes the perfect place for you to set a trap, because the only animal that is covering that ground is going to be the coyote
  • Trails and paths. Coyotes appear at night along trail ways and other more clearly marked areas that they tend to move away from during daylight hours. I always catch my coyotes at night when visibility is down and they are more likely to make a mistake. Paths make for an easier way for the coyote to get towards their preferred destination, and thus their guard may be lowered as they move along them

Confuse the coyote and lure him in

Try to catch the coyote when he least expects it. I’ve found digging a hole and basing my trap setup around that is a great way to get them caught when they can’t wiggle their way out.

Decreased mobility is going to work in your favor. By trapping them partially in a hole or by placing some feed in a hole just beyond the trap, your odds of success will increase.

Here is a video on how to make a dirt hole set.

Also, note the decoy strategy here. The more factors you have working in your favor, the better. How to track a coyote boils down to outthinking him, and taking advantage of him where he is weak. Hills, food, and animals are three of those areas.

How to trap a coyote: What to avoid

Coyotes are smart animals, in addition to being incredibly fast and agile. As such, any type of cage trap isn’t likely to work. The animal will detect it from afar and steer clear of it entirely.

Another thing to avoid is breaking the law. Depending on where you are located, there may be differing regulations and advisable procedures for setting, trapping, and handling a coyote.

Always check with your local wildlife department or animal control sector to find the best way to solve your problem.

Additionally, don’t set up your traps near dry brush.

Coyotes tend to stick away from these kind of areas as them make noise, startle them, and generally aren’t productive for them. The same goes for hay and other animal edibles that coyotes don’t like.

Do some research on what attracts coyotes in your area and incorporate those things into your strategy.

Conclusion

Trapping coyotes is tough, but by following these best practice your odds of getting rid of the nuisance will increase.

If you have to trap a few before getting the right one, so be it. After all, your livestock and income are at stake here.

If you have enjoyed this article, please give it a share on your social channels and do your part to increase awareness. Have a strategy that works in your specific neck of the woods? Check my recent post about the best gun safe for the money to storage your weapon of coyote hunting. 

Leave a comment below so that any in the region can adopt the same policy.

What Are the Best Shotgun Scope Options for Deer Hunting

What is the best shotgun scope available on the entry-level market right now?

There are a number of them, and most of them essentially get the job done the same way.

best shotgun scope for hunting

best shotgun scope for hunting

It is important to identify whether the shotgun scope you are looking to buy is going to solve your personal problems, such as increasing the line of vision, improving accuracy, or making the transition from the range into the hunting field.

The best shotgun scope for you depends on three factors:

  • What type of hunter you are, and your experience level
  • Whether you’re shooting long range
  • How important it is to you to have the top measurements in all categories

Let’s take a look at the best shotgun scope in those three categories: Shotgun Scope for the gear nerd needing top measurements/ for the experienced hunter/ and Shogun Scope for solving the problems of the everyday hunter

Top Our Pick For Best Shotgun Scopes For Hunting 


PRODUCT DETAILS    
DS2-table-__image

Nikon Prostaff Shotgun Hunter 2-7 x 32 black Matte Riflescope(Bdc 200)

  • Hi low mounts. No problems with clearance or mounting
  • 200 yard or higher moving targets.
  • Seamlessly consistent across both platforms, perfect for those trying out a new way of shooting
CHECK ON AMAZON
DS2-table-__image

Bushnell 751432 Trophy Riflescope, 1.75-4x32mm, 1" Main Tube, Circle-X Shotgun Slug, Matte Black

  • Focuses extremely fast as the top priority
  • Sluggers find consistency across the board. The reticle is best in class
  • The light transmission is fantastic
CHECK ON AMAZON
DS2-table-__image

Simmons 517793 Prodiamond Shotgun Prohunter Riflescope (4x32, Matte)

  • Perfect for short range hunting
  • This is the one scope on this list that really accentuates the ‘entry-level’ moniker
  • Perfect for twilight and early morning
CHECK ON AMAZON

Top 3 Best Shotgun Scopes On The Market 

This is my review about three shotgun scope options on the market, it will help you find the best for hunting. Check out it:

1. Simmon Prohunter Prodiamond Shotgun Riflescope (1.5-5X32, Matte)

best shotgun scope

Best shotgun scope for the gear nerd needing top measurements

This scope has a design and features perfect for a serious hunter. At this price, it beats expectations easily. You may worry a budget scope cannot live up to the more expensive models, but when it comes to this Simmon scope, you would be wrong.

You get amazing optics paired with durable construction for a scope that will knock your socks off. When it comes to the experience, you get HD clarity coupled with high-quality, multi-coated glass that is water and fog proof that provides for excellent views. It also features a rubberized variable power ring.

Moving targets are no problem thanks to the TrueZero fingertip windage and elevation adjustment system and Quick Target Acquisition eyepiece. The 5x magnification and 32 mm objective lens suit your every need when out in the brush, forest, or field. The ProDiamond eyepiece offers about four inches of eye relief for the entire range.

This scope weighs in at 8.6 ounces and measures 11 5/8 inches long. It has a sleek look that pairs well with just about any rifle. The combination of high-quality craftsmanship, sleek design, and special features makes this a great choice when you need a scope that can stand up to the demands of a busy hunt.

Outperforms expectations in wooded areas where you are trying to take aim for a 200-yard shot and the line of sight is questionable.

The light weight is wonderful if you worry about the overall gun weight and want to keep it low.

No worries about bumping or moving the scope as it will hold to zero despite rugged conditions.

  • Hi low mounts. No problems with clearance or mounting, you’d think this scope was developed by the gun manufacturer
  • 200 yard or higher moving targets. If you use the gun for long-range shots, this scope will be the best of the entry-level class for your money

2. Bushnell Trophy Shotgun Scope with Circle-X Reticle, 1.75-4 x 32mm, Matte Black

Bushnell Trophy Shotgun Scope with Circle-X Reticle

Best shotgun scope for the experienced hunter

Best Shotgun Scope for the experienced hunter

The best shotgun scope for those already bringing a level of confidence to the table is this one.

The Bushnell Trophy falls behind others in magnification and eye relief, but not far enough that a confident shooter won’t be able to hit their target. If you are looking for a scope that focuses extremely fast as the top priority, this is the best scope for you

Bushnell really focused on the windage issue with this scope.

Mounting and elevation are secure and consistent across different guns, as you’ll find that hi low mounts typical among entry-level scopes will do the job. Get 1 inch rings and a mounting rail.

If you hunt in foggy or otherwise non-optimal conditions, or at altitude or across widely varying different seasons, this scope will give you a consistent line of sight. It’s versatile. You’ll never find yourself searching for a wipe or needing to remount in a situation where the scope should have performed

  • During the golden hour (either morning or evening), the light transmission is fantastic. You’ll have the best vision of the season
  • Sluggers find consistency across the board. The reticle is best in class
  • It isn’t as versatile as it could be. Experienced shooters will have to use their skills to make up for the reduced magnification

3. Simmons 517793 Prodiamond Shotgun Prohunter Riflescope (4x32, Matte)

Simmons 517793 Prodiamond Shotgun Prohunter Riflescope

Shotgun Scope for solving the problems of the everyday hunter

Shogun Scope for solving the problems of the everyday hunter

While the magnification (4x) is not a speck above standard, Simmons outdoes itself with the 4 inches of eye relief. Coupled with that is the Quick Target Acquisition, making this scope a great option for beginners and regular shooters.

The imagery is good for hunters of moving targets, especially deer, turkey, and others than tend to bounce as they trot. So this scope is perfect for deerhunting.

For newer shooters, the windage issue isn’t really a problem with the Simmons. It is the best shotgun scope for them because the elevation adjustment system isn’t going to budge, no matter the weather condition or season.

I like how easily it mounts onto my 870 remington shotgun. The one issue I have heard about with this scope is hard recoil. I recommend shooters to really fasten the scope securely and double check that everything is lined up right.

Most younger shooters that aren’t able to suck up the recoil as naturally may see problems if shooting many 3030s or similar rounds. But for less recoil, this scope will serve just fine

  • Perfect for short range hunting. You won’t find a better scope at 75 or fewer yards

  • Improves accuracy greatly, another reason why it’s best for beginners. This is the one scope on this list that really accentuates the ‘entry-level’ moniker

  • Light is collected and displayed really well. Perfect for twilight and early morning

Finding their niche

The best shotgun scopes on the market are all sufficient at basic daily hunting and range shooting.

Where they differ comes down to the slight intricacies of the manufacturer and how the scopes handle themselves once mounted.

You experienced shooters should go with the Bushnell Trophy Shotgun Scope, while I strongly recommend the Simmons scope for anyone who hasn’t used a scope before or is new to shooting. It is the most basic of the three

Conclusion

Overall, the best shotgun scope in this entry-level class is the Simmon Prohunter Prodiamond Shotgun Riflescope. Its versatility, high level of magnification, and ease of use make it a no contest for those not willing to break the bank on their shotgun scope.

Mount it securely and do a test run at the range before bringing it into field, and you will find a pleasant, replicable experience each time you hunt – no matter the location or time. If you have enjoyed this article, please share on social media so that we can get more hunters to put thought into their scope selection.

If you are using a shotgun, please consider buying the best gun safe for the money to store it.

Feel free to leave a comment – I’d love to get a conversation going

What is the Correct Way to Shoulder a Shotgun

An accurate shot begins with a proper mount and shoulder of the shotgun. As you progress as a hunter, from beginner to a more experienced shooter, certain patterns will begin to take form. One of the most important of these patterns is finding the best way to shoulder a shotgun.

What Is The Correct Way To Shoulder A Shotgun
Mesa Tactical

How to Shoulder a Shotgun

Experienced shooters have their shouldering skills down to a science. It takes almost no effort to get the butt of the gun into the pocket and stance ready to go. I’ve been using the same shouldering stance since I started shooting, and I’m going to walk you through I there today. Let’s get started.

1. It starts with the feet

Just like in football, good footwork is incredibly important in shooting. The shoes that you wear should be well broken in field boots, or other active wear that are comfortable and flexible. Start by placing the feet about shoulder width apart. A little more than half of your body weight should be on the front foot, with knees bent and ready for action.

I usually draw a reference to bowling when describing the foot placement to people. I know this sounds weird, but hear me out – when bowling, it is important to position your body in a way that drives the ball toward to the pins you are aiming at. The same thing is true in shooting. Aim your back foot towards the target (as best you can).

  • Make sure your feet are loose and agile, should you need to shift. We’ll talk about this more in the next section.
  • Stand up straight at first, and then loosen yourself down into position with knees bent. This will keep you from standing to firm, standing to far forward, or not being ready to react and shift.
  • Don’t tense up. Part of accurate shooting and the correct way to shoulder a shotgun is to be loose and ready.
  • Here is a great quick video on shouldering a shotgun.

2. Body movement and flexibility

In shooting, it is important to keep all body movement symmetrical to the gun and to the rest of the body. The gun hits the pocket at a 45-degree angle. Your eyes peer over the top of the shotgun at the same angle. The back of the head is perpendicular to the spine.

Once in position, all movement should come from the hips. Twisting and turning from there will allow you to keep the gun level and your aim on point. Be careful that you aren’t shifting your back around while in position. I always like to keep my knees bent slightly, for that extra bit of added pop. If I need to do any height adjustment, it comes from the knees. I never lift my toes or ankles up off the ground – it is important to keep the feet level, flat, and comfortable. Toes should be able to jiggle but the feet shouldn’t actually move.

Any shift required to hone in on a target should be initiated by a twist of the hips. I encourage you to do a bit of stretching before heading to the range or out in the field. This will ensure that you are loose and won’t pull any muscles should you need to move slightly to zero in on a target.

3. Find the pocket

Let’s start here by lifting the right arm. If you aren’t already familiar with the pocket between your shoulder blade and neck, feel around until you find it. Before ever trying to fit your gun to the pocket, take a block of wood, a book, or some other firm object in your opposite hand and try to fit it into the pocket.

Once it’s in there, move around a bit. Find the positioning with the least pushback. Try to move your shoulder around in circles and ensure that the object doesn’t just slide right out or cause any discomfort.

When the gun is in there, it should have no problem staying there with the small bit of applied pressure from the other hand. The National Shooting Sports Foundation does a great job of showcasing fitting the gun to the shoulder, and realizing that you don’t have a gun fit problem, in the below video.

4. Consistency

Face should connect with the same spot on the gun each time. You want your eye to be right over the center of the rib, providing a clean line of vision. This shouldn’t impact either the comfort level of the gun in the pocket or the accuracy of the shot. In order to have consistency, you’ve got to have comfort.

This is a repeating theme that you’ll find in each of the tips I’ve provided here. The best way to shoulder a shotgun is also the most comfortable way to shoulder a shotgun. There shouldn’t be much pressure on the shoulder before the shot. During the shooting process, the movement of the gun should trigger a similar reaction from the body. It should be a slithering snake-like process.

The gun fires, the body reacts and moves with the shot, and then the posture is reset post-shot.

After the shot, you shouldn’t have pain the shoulder, wrist, or elsewhere. It should be as though not much has happened – the main thing going through your body should be excitement at making a great shot from the pocket.

Conclusion

Mitch Barrie

When asking yourself, ‘What is the best way to shoulder a shotgun,’ the correct answer is to find the pocket and then get yourself comfortable. These steps should help you to establish a solid, actionable stance that will increase both your accuracy and your comfort. Whether at the range or in the field, shouldering the shotgun correctly is as important as using the right ammo. Do some practice in your garage, and if necessary, have your gun personally fitted to you. Any gun shop can make this happen easily.

If you enjoyed this article, please share on your social channels. Education is key to top performance when shooting. Go ahead and post a picture of you in your shooting stance down below in the comments. I can’t wait to see what you’re shooting!

How to Sharpen a Broadhead

When it comes to bagging a deer, having a sharp broadhead is just as important as mastering the art of long-range archery. Without a good blood trail, locating your kill or wounded deer can prove to be quite difficult. A sharp broadhead will puncture the flesh and skin more directly and completely then a dull one, causing more blood and faster bleed out. It’s very similar to any type of sharp knife – the sharper the blade, the harder the bleeding. Here are the best practices for how to sharpen a broadhead.

Identify which type of broadhead you are using and assemble the tools

A fact that many new archers don’t realize is that most broadheads require at least a small bit of sharpening to reach optimum performance. If you’ve bought the kind that are manufactured specifically to be incredibly sharp and not need sharpening, you’re off the hook for now.

I’d venture to say that a vast majority of broadheads will need at least a quick tune-up before being ready to hit the field.

I recommend using broadhead arrows when hunting because they penetrate much better than other arrow types, and are also more accurate. Now that we’ve identified the broadhead type, let’s make sure that all necessary tools are on-hand:

  • Broadhead sharpener. These can be picked up at a hunting store or online. It’s worth it to buy a decent one for the garage if you plan to bow hunt regularly. Small, cheaper ones are also available for use on the go if that’s more your style.
  • Sharpening stone. If you don’t have a specified broadhead sharpener, a sharpening stone can get the job done. You’ll have to exercise more control and precision here. Obviously, you don’t want to cut yourself.

Sharpening with a broadhead sharpener

I keep a dedicated sharpener at home, as I don’t really like to do it on the fly or use equipment that isn’t meant for the task. The first step, before any sharpening takes place, is to install the broadhead onto the arrow to make sure it fits properly. Once you’ve got the head onto the arrow, we’re ready to use the sharpener. This tool allows users to hold the arrow by the end near the broadhead. You’ll want to get a secure grip on it using both hands.

  • Place the arrow in the center of the two plates at the top of the sharpener. The broadhead should be on top of the plates.
  • Sharpen the head by running it along the plates, much like you would a kitchen knife on one of those automatic sharpeners. It’s important not to counteract your sharpening by going back the other way.
  • Run it along from the back of the broadhead in towards the tip. This always seems to give more control over the action, in addition to optimizing the sharpening process.
  • Check the head for sharpness by lightly rubbing your finger along it at a perpendicular angle. Again, keep in mind that this is similar to a sharp kitchen knife- if you scrape too hard or the wrong way, you’re going to cut your finger open. I’m not going to sit here and tell you precisely when the head is ready. When it’s sharp enough, you’ll know.
  • If you are using top of the line arrowheads, I highly encourage you to use a dedicated sharpener. This will improve the life of the arrowheads, maintain accuracy, and ensure the best job of sharpening is done.

Sharpening using a whetstone or other file

If you aren’t keen on spending some cash on a nice sharpener, a whetstone will do the trick. Just file the headstone as you would anything else on the whetstone. 3 pronged broadheads are tough to do on a surface like this, but other than that you shouldn’t have any problems.

I don’t recommend doing this with top-notch broadheads, for risk of damaging them and having to spend a bunch of money replacing them. But if you’re out in the field or on a camping trip, having a portable way to sharpen the heads is typically better than nothing.

A bastard file is my favorite of these. Approach it like you’re using a dedicated sharpener, with the broadhead attached to the arrow, and file like you would anything else on there. Again, pretty tough with three-pronged heads, but you get the gist. You can take the bastard file anywhere: keep in your pocket or in your satchel.

Conclusion

Broadheads can be sharpened in a number of ways. Ever since I was a kid, I’ve been taking the extra time to keep the heads sharp and clean. Accuracy is your best friend when out in the field, and leaving a solid trail of blood to track down the animal is going to make the entire process easier.

I hope you’ve enjoyed this article on how to sharpen a broadhead. Please share on social media so that your friends and family can learn the benefits, and feel free to leave a comment. I’d love to get a discussion going.

How to Attract Deer to Your Yard

Some of us are fortunate enough to live the dream, with a nice open piece of property behind our home. Perfect for fishing, backyard camping, and of course, observing nature. For the latter, you’ll need to know how to attract deer to your yard.

I live in a house that backs up to a vast landscape of hunt-able land.  Over my twenty years here, I’ve mastered several techniques that draw deer in and keep them around. The best part is that once a few deer come in, more always follow.

5 Tips to Attract Deer

Let’s take a look at my 5 techniques.

1. Increase the amount of shrubbery in your yard

This is key, as deer are constantly grazing. The more natural in appearance the plant life, the more deer will be attracted to it. Having shrubbery native to your area is equally as effective. For how to attract deer to your yard regularly, follow these tips:

  • Tall shrubs work the best in attracting deer to your yard. Taller plants can spread their seed further, which encourages additional growth as well as brings in wildlife that pick up on the smell.
  • The more unkempt the shrubbery, the more natural it will appear to the deer. This will pique their interest more than perfectly planted lines of bushes and plants.
  • This video shows a particularly effective deer attractant

2. Keep a calm and serene environment

Deer are skittish animals. They spook easily, and certainly won’t hesitate to bolt if they feel at all threatened. To attract deer to your yard, you’ll want to keep a quiet, peaceful environment. Minimize noise escaping from the home.

Along the same line, don’t have loud birdfeeders or clanging wind chimes hung from the porch. Deer feel comfortable solely in natural settings free from outside distractions.

Reducing the ‘barrier to entry’ helps as well. Deer aren’t going to hop over a tall fence that they can’t see through. Do everything you can to meld your yard in with the natural settings beyond your property.

They also aren’t going to approach bright light, so turn off your porch lights when not in use and don’t have unnecessarily bring or shiny objects sitting around. We’ve all seen how deer act when they are caught in headlights. The initial freezing, followed by a quick escape as soon as they feel threatened.

3. Have water available for the deer

If you’ve got a small pond in your yard like I do, then you’re in luck here. Mine is a natural water source, I don’t even have to feed water into it. The deer love it because it is exactly what they are used to.

If you haven’t got a pond, consider adding a water fixture of some type. Even if it isn’t natural (such as a bath or fresh water pool), you will still find that it attracts deer.  Avoid chlorinated pools, or anything with a bunch of chemicals in it. The point is to offer the deer a place to refresh and have a drink, and they can smell that chlorine a mile away.

  • If you live in an area with a strong winter, keep logs of wood in the water to prevent it from freezing.
  • Replenish the supply consistently so the deer come to trust the water source.

4. Have a large salt lick or other food source

To get deer into your yard, having a large salt lick for them to taste is a great idea. They smell it, which brings them in from afar. Once they’ve tasted it, they will continue coming back for it and may even hang around for a bit. This is particularly true if you have a water feature for them to enjoy – we all know how salt makes us thirsty.

I don’t recommend putting the salt lick on your porch. Deer will be more hesitant to approach if it’s that close to the house. They’ll like it more if it’s out in the yard, maybe on a fence. Or, better yet, right next to the water source.

  • If you can’t get ahold of a salt lick, a mineral block or other block high in sodium will suffice.
  • Keep it away from areas of heavy movement. No dogs, children, or other ornery activity should happen near the salt lick.
  • Corn feeders also work great. I have both a salt lick and a few corn feeders in my back yard. This gives the deer an easy source of food, which gives them (and their pack) ample reason to return again and again.
  • Deer love oak trees. Dotting your property with oaks will attract large numbers of deer. They feed on the twigs and leaves, as well as the acorns found on the tree.

5. Install grasses that deer love

There are a handful of grass types that deer love to graze. A good thing about grasses is that it will attract them from quite a distance and, if you have enough of it, keep them coming back despite the other techniques listed here. If you live in an area where it is possible to use one of these, then go for it:

  • Bluegrass
  • Wheat
  • Fescue
  • Minimize the amount of pesticides and chemicals in the grass, so as not to turn the deer away.

Ferns will also attract deer to your yard. Keep these ferns in shady spots, and do everything you can to help them thrive. The better the ferns, the higher the odds the deer will be attracted to them.

Now you have a basic understanding of how to attract deer to your yard. Hopefully, you live in an area surrounded by wildlife already – your chances of attracting deer are very high if you follow these steps. If you have any tips or techniques that you’d like to share, please leave them in the comments here so we can get a discussion going. If you found this article helpful, feel free to share on social media. Keeping deer around the yard is relaxing and surprisingly not that hard to do, it just takes some persistence!

Featured Image by glasgows

How to Find a Coyote Den?

Do you know how to find a coyote den? The toughest thing about finding a coyote den is the pure intelligence of the animal.

Coyotes have great instincts and are quick to adapt to different situations – natural and predatory. Coyotes should be monitored if you have livestock or significant agriculture, and there are multiple steps on how to find a coyote den that we will discuss here.

Research a coyote den’s characteristics.

First and foremost, note that coyotes do not use dens year round. They primarily use them for pupping, or when elements drive them inside. Typically, coyote dens are located on hillisides and deep creek beds that allow for easy digging and earthmoving. Loose shrubbery and branches also come in handy, giving the coyotes a bit of extra security. Here is a great video about coyote dens:

  • Pups move out at a young age, but remain active in any hiding spots around the den. Coyotes frequently sleep outside, and despite being near den, aren’t necessarily going to be in it. Keep this in mind when approaching.
  • Dens are typically located below ground level, sometimes up to five or six feet down. There will be a dug-out tunnel that leads to a main living area that is expanded and can fit multiple coyotes.
  • Coyotes typically rotate between multiple dens. They will be spread out around an area, and the animals are very careful not to lead others back to their den. This is what makes it so challenging when learning how to find a coyote den. Here is a great article explaining the basics behind coyote denning.
  • Identify water sources nearby where you suspect a den may be. The coyotes need to drink water, so if you can confirm they are drinking from a certain source than you are on the right track.

Identify where you’ve seen or heard the coyotes.

Likely, you’ll hear them howling at night, or in the early evening. On the edges of nature preserves, parks, green spaces, and hillsides, coyotes actually tend to make their presence quite known- it’s the exact location that is much harder to pinpoint. Then comes the process of finding a coyote den. Plan to devote several days to the process, if you’re really serious about finding it.

You may find scat or other remnants of their presence in areas near your home. Try walking about fifty feet further out and seeing if you find more, if so, you have identified which direction they are coming from. Here are some tips to help everything go smoothly:

  • Coyotes typically prowl about five or six square miles from their den, in any given direction. The further they roam from the den, the more on edge they will be. This means they will be more easily startled and quicker to retreat.
  • They are quick and often deceiving because you’ll hear them in one place one moment, and in another the next. Try to track where you most frequently see or hear the coyotes. Even if that’s not their den, you’ll have a general idea of their path and where they spend the most time.
  • If you aren’t having any luck, try howling and seeing if you can generate a response from the coyotes. Try different pitches, tones, and cackles that resemble those made by the animal

Where could other prey be located near your property? Maybe their coming around has nothing to do with you or your property. If there are collections of prey, bodies of water, or other attractive elements nearby, try tracking them from that spot back to the den. For basic tracking techniques, check out this video.

https://www.youtube.com/watch?v=ZpWmfw3lmS0

Track the coyote back to its den.

If the coyote has attacked any of your livestock, you’re likely very upset and wanting to get the pesky coyotes as far away from your animals as possible (if not take it a step further!). Be careful when searching around at night, and definitely DO NOT BRING YOUR DOG WITH YOU. Coyote hunting is an exciting activity, but one best done alone.

The animals spook easy and even if you do locate a den, the odds that they will return there are very minimal if they know that you have found it. All things considered, you shouldn’t have too much of a problem tracing the suspect back to its den from the site of the kill. Here’s what to do:

  • Look for blood stains, trampled shrubbery or plants nearby the kill site. Figure out the most likely direction of escape and trace the potential route with your eyes back to a nearby hillside or embankment.
  • https://www.youtube.com/watch?v=04cmkr6da6c
  • Identify a game trail or other foot markings left by the coyote leading up to the hillside or embankment. If you can’t find any obvious trails, look for markings left on nearby trees or other larger vegetation.
  • Follow that path as closely as you can. Remember, it may be up to six miles, so having a four-wheeler or motorbike may come in handy. Although you’ll want to be as quiet as possible during the final or actual approach.
  • When close, let out a coyote howl and see if a response happens. If you get one, don’t be surprised if you do not receive another for quite some time. Be ready to track based on the one howl that you got from the coyote.
  • Always be careful! Shoo them away but don’t put yourself in danger.

Conclusion

Locating a coyote den is often a lengthy process. Personally, I enjoy it because it’s a good excuse to get out into nature and focus on something direct and real.

Remember to track the coyotes via sounds, tracks, and any sightings you encounter, for several days before attempting to locate their den.

I always suggest perusing around your property regularly just to keep aware of any new ‘neighbors’ and to establish a firm presence and authority.

If you found this article helpful, please share on social media, and don’t forget to leave any comments here. Let;’s get a discussion going!

Featured Image by wplynn

Visit Us On FacebookVisit Us On PinterestCheck Our Feed